Tuesday, 25 February 2014

Solar Charging for Electric Bike (2)

The cheap-skate version of my lithium battery solar charger was a success IF (there is a big IF) I monitor it continously, i.e. the output power of the converter (and losses) is less than the solar panel output power (Watt). I had to do this by changing the CC (Constant Current) setting.

The problem is, everytime the solar panel power (Watt) drops below the required output power (let say due to passing clouds), the DC-DC converter (CC-CV) becomes unstable. I'm guessing this is because the converter is trying to suck out even more current out of the panel. For example:

At 9 o'clock in the morning, I set the CC of the converter so that the output power of the solar panel reaches 39.4W (out of 80W rated Wp). When I tried to increase more power, the converter suddenly became unstable (making humming noise) and output of the solar panel drops to around 15 - 20W (jumping erratically). I had to decrease the CC setting all the way down in order to re-stablise the converter, and then turning it back up. unplugging and replugging the load didn't stabilise the converter.

Later, I found out that installing huge capacitor (I tried 15,000uF, definitely can do with less) at the converter input can help to stabilise the converter. Although, you still have to unplug the load and replug it back in.

So, in short, I was the slave labour to mimic the MPPT. By 12 mid-day, I managed to squeeze 67W out of the solar panel. The converter is pretty hot at this point of time (still touch-able) even with extra heatsink that I installed.

From my test, between 9am to 3pm (this time of day of the year), without any cloud, the panel can comfortably supply at least 40W (out of the specified 80Wp), so I don't need to fiddle much with the CC setting of the converter. Obviously, in practice, even the slightest cloud passing will throw this converter out of whack. So slave labour still required to monitor.

Oh, converter effeciency is around 89%, using power consumption figure from my in-line power meters. Not too far from the acclaimed 92% from the product website.

Next step, is to design and build my own BMPPT solar charger, as there is no way I can do this MPPT manually all the time. The current one in the market that fits my battery pack (36V 11.6Ah) simply doesn't exist. Either Genasun or GSL don't fit my charging profile. From googling the web, the Tim Nolan's one inspired me to make mine from Arduino Uno. Watch this space!

Ah VS Wh for Lithium Battery State of Charge

Following previous post, I've found out the in-line power meter that I bought from eBay does not count Ah and Wh properly. This one only counts properly when output current and power is constant. When the output drops to zero, the Ah and Wh also drops to zero. What the??

So, I managed to find this one from Altronics (Manson), and work as expected. Definitely not worth to buy el-cheapo in-line power meter, for any model (after googling around). Save yourself lots of trouble and get the manson one instead. So, here's my final circuit:


Trying to minimise my loss, I use the crap-o-meter to display Volt, Ampere, and Watt for solar panel output. The good one, I use for coulomb-counting for battery charging. I wasn't sure whether to use Ah or Wh to calculate the State of Charge of my Lithium battery pack. My original thought was using Wh, as surely energy is better indicator? However, I trust white paper more than some Joe-Blog opinion (like myself). ALL white paper that I found so far, mention 'Coulomb counting' (i.e. counting Ah) is one way to monitor your state of charge, so that what I'll do for my battery pack. One of example of the white paper can be found here.

From my own testing, charging using Ah seems more accurate than using the Wh. Here is the example:

I used 6.864Ah or 248.02Wh in one of my commuting day last week. I got this figure from my 'cycle analyst' installed in my electric bike.

When charging (with constant current 1.2A most of the time), I stopped the charging at 6.6Ah or 259.6Wh according to my Manson in-line power meter (using my solar charging circuit). At this time, the voltage of the battery pack was 41.78V. After almost 2-day rest of the battery, my battery pack voltage was 41.4V (using cycle analyst).

Hence, from the above, definitely use Ah, NOT Wh counting for reliable discharge and charging of your lithium battery pack.

As you may already know, most lithium battery pack specify both in Ah and Wh. For example, my battery pack says 36V, 11.6Ah, 416Wh. However, from my usage so far, there is a few Watt discrepancy between the actual Wh and Ah (by simply multiplying it with 36). So, again, using Ah, not Wh for battery State of Charge, is definitely more accurate.

Wednesday, 5 February 2014

Pengisi Baterai Lithium Bertenaga Matahari

Walau pengisi baterai bertenaga matahari mulai menjamur, sayangnya sistem yang ada di pasaran (yang menggunakan 'pelacakan titik daya maksimum') sejauh ini khusus untuk baterai 'aki'. Untuk sistem pengisi baterai lithium yang banyak dipakai sepeda listrik, sistemnya masih jarang. Jadi, harga sistemnya masih mahal, contoh: http://genasun.com/all-products/solar-charge-controllers/for-lithium/gv-5-li-lithium-5a-solar-charge-controller/ 

Nah, ide saya:


1. Panel surya, 12V 80W;
2. Konverter DC-DC;
3. Pengukur Ah and Wh ;
4. Baterai 36V 11.6Ah, Panasonic cells

Alasan memilih sistem ini:

  1. konverter DC-DC di atas tidak memiliki 'pelacakan titik daya maksimum'. Tapi, berhubung saya ketiban untung dapat panel surya murah dengan daya yang lebih dari cukup, mudah-mudahan konverter ini bisa mencukupi. Lagipula, harga konverter di atas jauh lebih murah.
  2. Walaupun konverter di atas bukan ditujukan untuk mengisi baterai lithium, namun konverter ini bisa diatur sehingga maksimum tegangannya 42V. Sayangnya nggak ada 'auto off'. Melihat banyak artikel dari mbah Google, katanya tidak disarankan untuk mengisi baterai lithium dalam posisi ini (42V tanpa 'cut-off').
  3. Karena resiko di atas, saya menggunakan pengukur Wh (Watt-Hour). Jadi, bisa monitor berapa banyak 'tenaga' yang sudah masuk ke baterai.


Harganya sejauh ini bersaing dengan harga PLN-nya negara maju:

Solar Charging for Electric Bike

Thanks to absolute bargain I found from gumtree, now I can charge my electric bike battery using solar panel. Unfortunately, I can’t find any suitable charger system off-the-shelf. My requirement:

  1. MPPT (with booster) to charge e-bike battery directly from the solar panel. In my case, 12V solar panel to charge 36V lithium battery (Panasonic cells).
  2. Cost of the total system (solar panel plus chargers). If the whole system cost way too high ($/kWh of its lifetime), I’d rather charge them from the grid.


The closest one I got so far is http://genasun.com/all-products/solar-charge-controllers/for-lithium/gv-5-li-lithium-5a-solar-charge-controller/ but the price is a bit steep for me (must order the custom voltage for me). I'll put this on the back-burner when everything else fails :).

So, my idea #1 so far:

1. Solar Panel, 12V 80W (it only cost me AUD110!!);
2. DC-DC converter, CVCC (constant voltage constant current) (Ref #1 below);
3. Ah and Wh meter (Ref #2 below);
4. eBike battery (mine is 36V 11.6Ah with Panasonic cells)

Reasoning behind my selection:

  1. There is no MPPT in the DC-DC converter above. However, considering the cheap as chips unit, and plenty of 'oomph' in my solar panel, me think this should be OK.
  2. It's not a dedicated lithium charger. Although I can set the CV (Constant Voltage) to 42V, I'm not sure what is the degrading effect of leaving 'trickle' (float) charge at 42V. Reading many articles regarding 'float' charge of lithium batteries, I've come to conclusion "simply don't do it". Although, from my experience with the supplied charger, once it's topped up to 42V, it stays in this state for a long time. When I left the battery unused (after full top-up) for almost 2 days, the voltage is still 41-ish volt.
  3. Due to unknown risk above, I've decided to use the Ah (complete with Wh) meter. So I can monitor the charging accurately.


My idea #2 is to buy el-cheapo 12V to 240V inverter and use my supplied charger. However, I like the idea setting the charging current of idea #1 :).

Cost so far:


Not too bad. Definitely comparable to my grid-connected charger. Figures maybe optimistic (as in, the ability to charge everyday) :).

Results? Well, I need to wait until I get the converter first!

References:
1. http://www.prodctodc.com/dc-10835v-to-3563v-boost-converter-constant-current-led-driver-power-module-p-152.html#.Uum4Dz2Sx8E
2. http://www.ebay.com.au/itm/150Amp-Watt-Meter-Power-Analyser-Digital-LCD-/291054073099?pt=AU_Toys_Hobbies_Radio_Controlled_Vehicles&hash=item43c42cb50b&_uhb=1


Tuesday, 17 May 2011

Making Your Own LED Halogen Replacement

Although there are lots of cheap GU10 halogen replacement LED out there these days, and decent one too, but still very few that meet my requirement:
  • As bright as 50W halogen (around 850 lumens), and;
  • Although halogen has warm-white colour (3000K), I actually prefer daylight white (4000K), and;
  • Beam angle 35 degree or wider, and;
  • Under AU$25.

Those ones that are close to my requirement, so far, either:
  • cost much more than AU$50, or;
  • Not bright enough (see my rant in the next paragraph below), or;
  • Have very narrow beam angle (less than 30 degree)
  • Too bluish (around 6500K).

In term of brightness, lots of people on various website claim their LED halogen replacement have equal (or better) brightness with their 50W halogen counterparts. Well, a very narrow beam angle (like 15 degree or less), does make the centre illumination spot very bright. Indeed, brighter than 50W halogen, but it does NOT have more lumens (total light output). IF narrow beam angle is all you need, then these 3-watter LED with 15 degree beam angle or less are the perfect solution for you: cheap, bright, and very low power consumption.

But, until such thing exist (true 50W halogen replacement), I decided to make my own LED lighting. The new XM-L LED from CREE (well, with the current trend, it's soon to be replaced with newer and better LEDs still!) is the best candidate.

So, Components that are easily available to tinkerer like me:
  1. Light bulb housing, including heatsink and optic for LEDs: SKU13741,
  2. Constant current driver that can fit to the lightbulb housing: SKU14034,
  3. LED module: SKU51989.

I have to make some compromises with components above:
  • Not bright enough (from my calculation at the moment, it's only going to be 340 lumens),
  • Optics still too narrow, but excluding them from the assembly should be good enough,
  • Still too bluish with the available LED. I can get daylight white from other distributor, but they charge ridiculously expensive with over the top postage and handling on top of that.
I will report findings as soon as I finish my LED lightbulb!

Note: If you want MR16 halogen replacement, CREE has done the hard yard for you, check this out!

Sunday, 15 May 2011

Memilih Lampu Bohlam LED

Mentang-mentang lampu LED sekarang makin nge-trend dan makin murah, jangan sembarangan milih. Tempoe doeloe, kalo milih lampu paling cuman liat Watt-nya aja, makin gede, ya makin terang. Gampang kan? Masalahnya, lampu LED lebih banyak neko-neko yang mesti dilihat:
  1. Warna Lampu: Masalah warna baru keliatan kalo pasang banyak lampu deket2. Kalo lampu pijar (bohlam) biasa nggak usah pusing, mao bohlam merk apa juga warnanya sama. LED punya banyak warna, dari yang kuning kayak bohlam (warm white), sampe putih (cool white). Belom lagi tint: alias ke-ijo2-an atau ke-ungu2-an.
  2. Efesiensi: bohlam biasa, mao merk apa juga, efisiensinya nggak jauh beda. 90-95% energi yang dipake jadi panas, bukannya cahaya. Maksudnya gini: lampu pijar 100W, cuman menghasilkan cahaya sekitar 1700 lumen, alias 17 lumen/Watt(*). Lampu LED, saat ini, efesiensinya bisa mulai dari cuman puluhan lumen/Watt, sampe 230 lumen/Watt (*). Lampu neon yang paling efesien aja cuman sekitar 100 lumen/Watt.
  3. Sorot / omnidirectional: Lampu pijar sama neon biasanya omnidirectional (alias cahayanya nyebar kemana-mana). LED, dari sononya unidirectional (alias menyorot ke arah tertentu aja). Nah, di pasaran, jenis sorot-menyorotnya lebih banyak lagi (dari yang 15 derajat sampe 360 derajat), makanya konsumer mesti hati2 sebelom membeli.
  4. Jenis colokan: Yang model sekrup ato colok. Nanti kalo nggak masuk gimana? Asal colok bahaya loh!
Contoh:

Perbandingan lampu halogen 50 Watt, LED 3 Watt, neon 9 Watt:


Perbandingan warna, terang dan pola sorot:


Foto kiri atas: Lampu halogen 50 watt (sorot, 60 derajat),
Foto kanan atas: Lampu neon warm-white 9 watt (sorot, 120 derajat),
Foto kiri bawah: Lampu LED warm-white 3 watt (omnidirectional),
Foto kanan bawah: Lampu LED cool-white 3 watt (sorot, 15 derajat).

Bisa diliat kan, tergantung aplikasinya, yang mana yang cocok? Masalah warna dan sudut sorot mesti dipikirken dulu sebelom beli lampu LED.

Di aplikasi lampu sorot sendiri, besar/kecilnya sorot juga mesti dilihat. Lampu halogen sorot biasanya punya sudut sorot 60 derajat (foto kiri atas). Jadi, beli lampu sorot LED juga mesti lihat sudut sorotnya, kalo nggak, bisa terlalu lebar, ato juga terlalu sempit, kayak foto kanan bawah di atas (sudut sorot 15 derajat).

Tuesday, 8 February 2011

Lampu Taman Sel Surya

OK, akhirnya project lampu surya anaknya pak jenggot bisa di finalised! Setelah coba rangkaian sana-sini dan bermacam masalah (lihat posting sebelumnya), si penulis akhirnya memutuskan pake off-the-shelf LED driver.

Dah, langsung to the point aja:

Setelah tes lapangan lagi, pake LED Driver ZXSC310, hasil tokcer! Selidik punya selidik, ternyata selama beberapa bulan, batre NiMH yang kejemur setiap hari jadi tekor. Alhasil, batre cuman bisa supply sekitar 1.1V di malam hari, kecuali malam yang dingin (dibawah 20C).

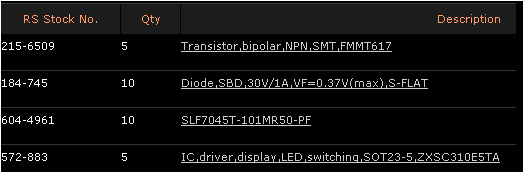
Nah, rangkaian baru diatas bisa beroperasi dengan efisien sampe batre 0.9V! Dapet darimana? Wah, ini tergantung situ tinggal dimana. Si penulis dapet dari RS Components: